Extracting DNA from Strawberries: A Homeschool Science Adventure
With Glow-in-the-Dark DNA Magic!
When you think of DNA, you might imagine a high-tech lab with scientists in white coats working under microscopes. But what if I told you that you can see DNA with your own eyes, right at home, with a strawberry, glow-in-the-dark face paint, and a few simple ingredients from your kitchen?
This experiment is not only doable… it’s magical.
For homeschooling families and curious kids, it becomes a doorway into the invisible world that powers all life. And now, with glowing face paint added to the extraction, the DNA strands become even more dramatic when you shine a UV flashlight.
Let’s dive in.
What Is DNA?
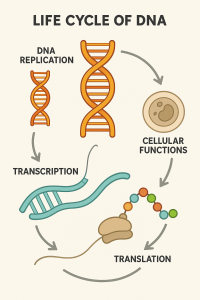
DNA stands for deoxyribonucleic acid. It’s the genetic material inside nearly every living organism. DNA is like a biological instruction manual telling cells how to grow, behave, and function.
We normally cannot see DNA because it’s tiny and tightly coiled, but when we break open the cells and separate out the DNA, we can see it clump together.
That’s the magic of this experiment.
Why Strawberries?
Strawberries are perfect for DNA extraction because:
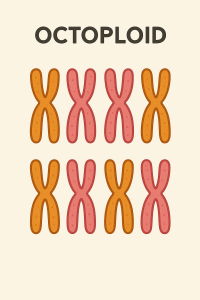
- They are octoploid — eight copies of each chromosome
- Soft and easy to mash
- Lots of DNA per cell
- Safe, inexpensive, and fun
Materials You’ll Need
- 1/2 cup fresh strawberry
- Resealable plastic bag
- 2 tablespoons of dish soap
- 3 teaspoon of salt
- ½ cup water
- Prefer: a very fine strainer OK: Coffee filter or cheesecloth
- Clear glass or cup
- Rubbing alcohol (chilled in freezer 1 hour before the experiment)
- Small bowl and spoon
- Measuring spoons
- Glow-in-the-dark face paint stick (¼ to ½ inch cut)
- Blender
- Optional: goggles, apron, notebook
Step-by-Step Instructions
1. Prep Your DNA Extraction Liquid
In a bowl, gently mix:
- ½ cup water
- 2 tbsp dish soap
- 3 tsp salt
Dish soap breaks down cell membranes.
Salt helps DNA clump together.
2. Prepare the Strawberry
Remove the stem and place it in a resealable bag. Mash for 2 minutes until smooth.
3. Add the Extraction Solution
Add the extraction mixture to the bag.
Mash gently for 1 more minute.
NEW STEP: Add the Glow-in-the-Dark Paint
This is your magical twist — perfect for homeschool families, young scientists, and your curriculum videos.
3.5. Blend the Glow Paint + Alcohol
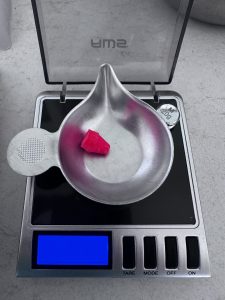
- Cut ¼ to ½ inch from a glow-in-the-dark face paint stick.
- Add the piece to your blender.
- Pour in a small splash of rubbing alcohol (just enough to help it blend).
- Blend until the glow-paint is completely dissolved and incorporated.
The alcohol helps distribute the glow particles evenly.
You now have a luminescent alcohol layer that will make the DNA strands glow under UV light.
4. Filter the Strawberry Mixture
Place a fine strainer, coffee filter or cheesecloth over a glass.
Slowly pour the strawberry mixture through and allow it to drip.
The filtered liquid contains DNA and other dissolved cell parts.
5. Add the Cold Alcohol + Glow Mix
Now continue the experiment from here:
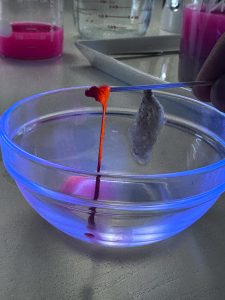
Slowly pour your cold alcohol mixed with the blended glow paint down the side of the glass to form a layer on top of the strawberry liquid.
Don’t mix — let it sit gently.
Within moments, the DNA will begin rising into the glowing alcohol layer.
This part always feels like magic.
6. Observe and Collect
Soon you’ll see white, cloudy, stringy clumps.
That’s DNA!
If you shine a UV or black light on it, the glow-paint will illuminate the strands beautifully.
Use a toothpick or skewer to spool it up.


The Science Behind the Magic
- Soap dissolves membranes
- Salt allows DNA strands to stick together
- Filtering separates solids
- Alcohol pulls DNA out of solution
- Glow-paint binds to the DNA clumps and lights up under UV light
Scientists do the same process in real labs, just without the glow-paint.
Learning Extensions and Variations
1. Try Other Fruits
Bananas, kiwis, blueberries… create a chart and compare DNA visibility.
2. Black-Light Science
Shine UV light at different distances.
Does the DNA glow more when closer?
3. Creative Storytelling
Write a story from the DNA’s perspective:
“I’ve lived inside this strawberry since it was a tiny flower…”
4. Build a DNA Model
Use beads, pipe cleaners, or candy.
5. Observe Carefully
Draw what you saw. Label it.
Ask: Why does DNA glow so well?
Cross-Disciplinary Connections
Biology, chemistry, math, writing, art, mindfulness, all woven together.
Common Questions
a. Is the strawberry edible after?
No.
b. Why glow-in-the-dark face paint?
It contains phosphors that glow under UV light and easily bind to clumped DNA.
c. Is the alcohol safe to handle?
Yes, with supervision.
Why This Matters in Homeschooling
Kids remember what they feel and what they experience, not what they memorize.
A glowing DNA extraction turns an invisible concept into a hands-on, unforgettable moment of wonder.
This experiment builds curiosity, confidence, and a deep love for science.
Here is the link to the video experiment.
Our Favorite DNA Tools for Curious Kids
If you’d like to dive deeper into DNA with your child, here are some of our favorite tools, books, and hands-on materials to keep the learning going at home. These are the exact items we use in our experiments.
✨ DNA Book for Kids: The Secret Code Inside You
✨ DNA Book for Parents and Educators: Simple Genetics: Facts Made Fast
✨ DNA Game: Variation
✨ Printables (link to be added after setting up the printable in Woo Commerce)